
This article shows you to install and set up Bitdefender Antivirus for Mac. The whole setup process should be taken 5 minutes.
Things to do before proceeding with the installation
1. Make sure your Mac meets the system requirements.
2. Create a Bitdefender Central Account if you haven’t already.
3. Remove the previous version of Bitdefender Antivirus for Mac or other antivirus installed on your system.
4. Make sure that you have a Bitdefender Antivirus for Mac subscription in your Central account so the product you install can retrieve its validity from your account. For activating your Bitdefender subscription provide a License.
• If you have an older license key for the previous Antivirus for Mac product, you can find how to transform it into a Bitdefender subscription, in this article.
Don’t have an activation code yet? Get with the lowest price
How to install Bitdefender Antivirus for Mac
1. The first thing you need to do is opening your Safari browser. Then sign in to your Bitdefender Central account.
2. Select the My Devices on the sidebar.
3. In the My Devices window, click + Install Bitdefender products on your devices.
4. A new window will pop-up. Choose Security, then click This device to install Bitdefender on your current Mac.
NOTE: If you want to Protect other devices, select this option (this will send an email with the installation kit to an email address of your choice).


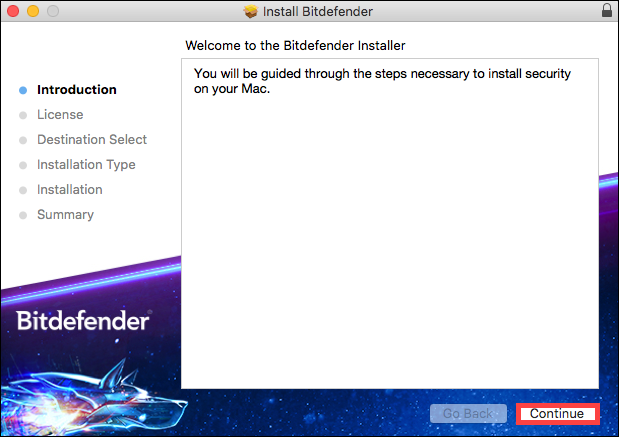
5. Choose Allow if prompted, the installer will be saved on your Mac. So open your download folder. Double click on the Bitdefender package file with the .pkg extension to run it. Then follow the on-screen instructions. Click on Continue to begin your installation.

6. Choose Continue.
7. Click Agree after you read and agree with a license terms agreement.

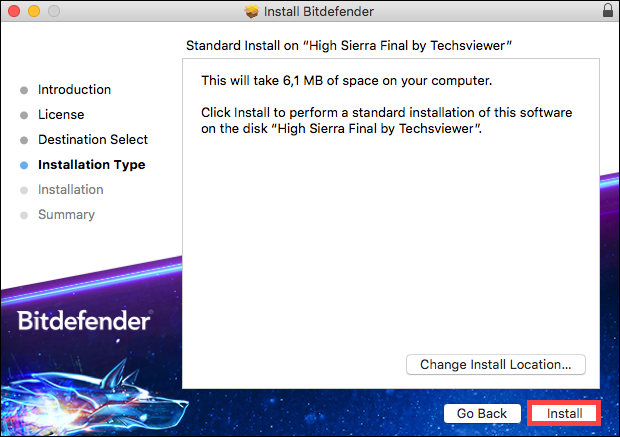
8. Select the disk where you want to install the Bitdefender software, then click on Continue. After that, select Install.
9. Enter your username and password then click on Install Software.
10. A small window will appear and Bitdefender Antivirus for Mac will automatically download and install on your Mac.
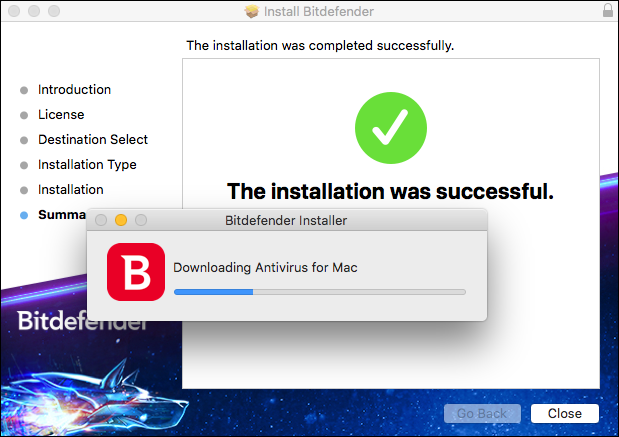
11. The installation is now complete on macOS Yosemite, El Capitan, and Sierra.
NOTE: Click the corresponding link below only if you have High Sierra, Mojave or Catalina. The rest of the macOS versions do not require these extra steps.
Your Title Goes Here
Your content goes here. Edit or remove this text inline or in the module Content settings. You can also style every aspect of this content in the module Design settings and even apply custom CSS to this text in the module Advanced settings.
How to continue installation on High Sierra 10.13
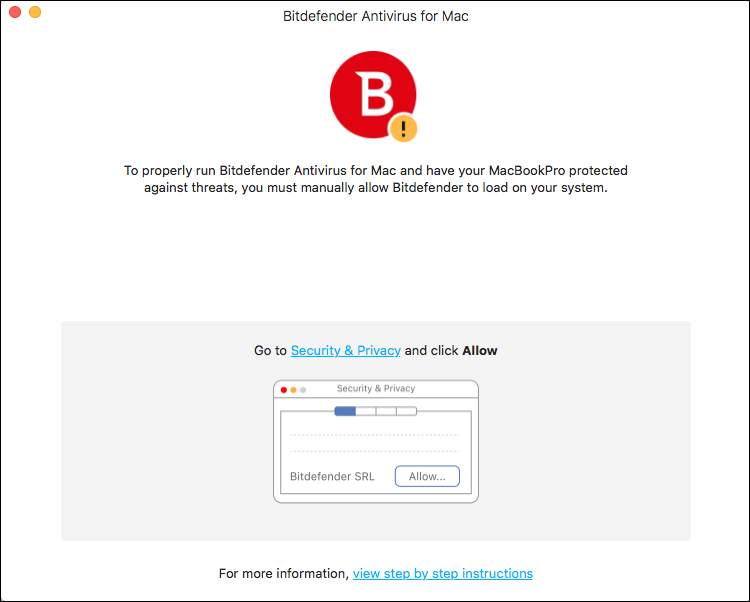
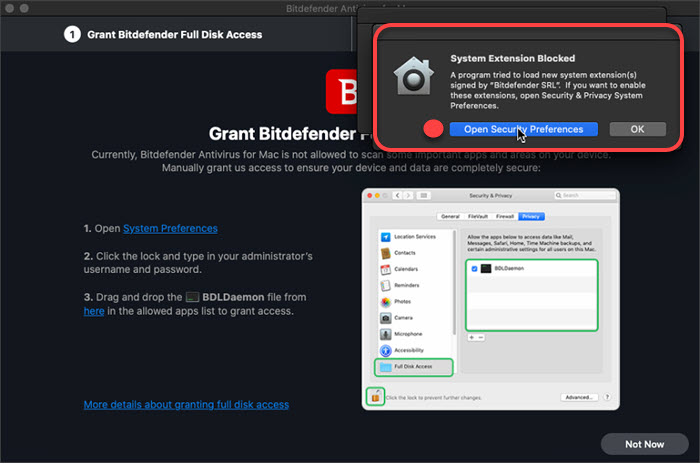
1. At this point, you will be notified that a system extension signed by Bitdefender has been blocked. This is not an error. Click on OK.

2. To help you with the setup, Bitdefender will display a window listing the steps necessary in order to run Bitdefender properly. Click on the Security & Privacy link.
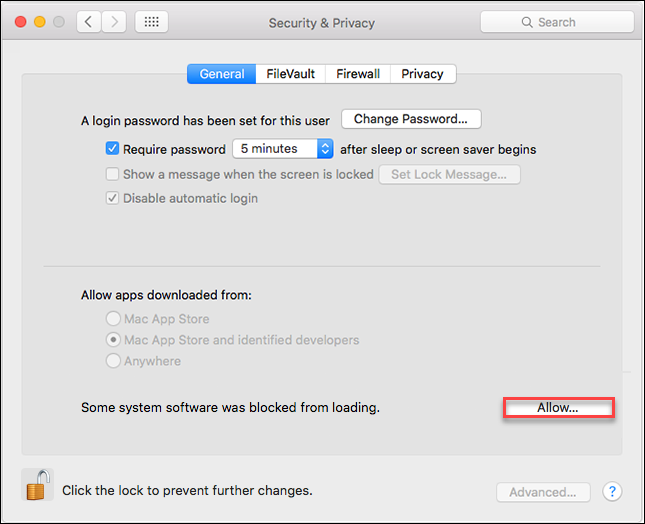
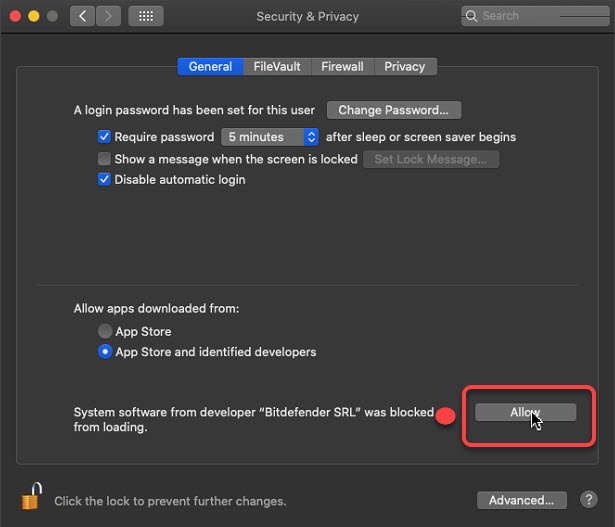
3. Click on the Allow button, in the lower part of the window.
Or select Bitdefender SRL from the list, then click OK.
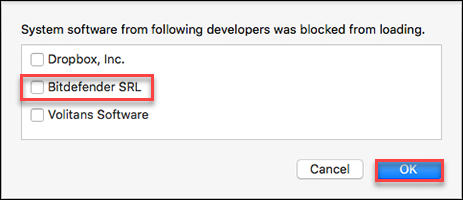
4. The installation is finished on High Sierra.
How to continue installation on Mojave 10.14
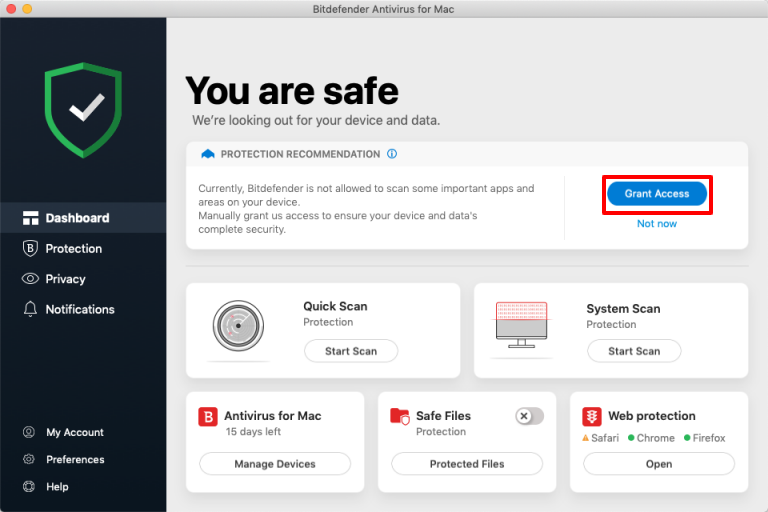
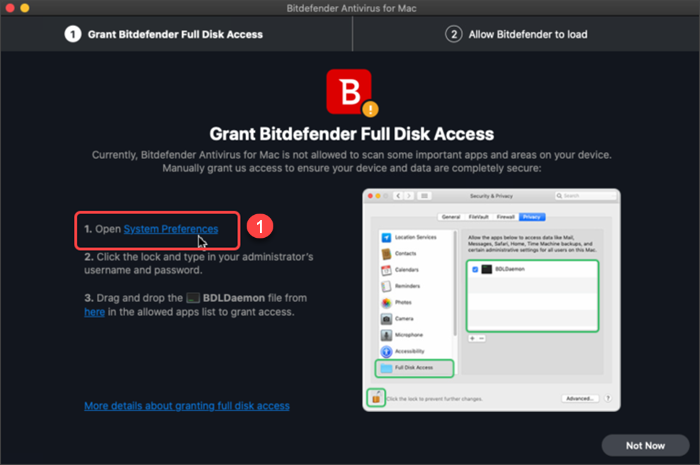
1. Open the main Bitdefender window and click the button Grant Access to allow Bitdefender to scan all locations on your device.
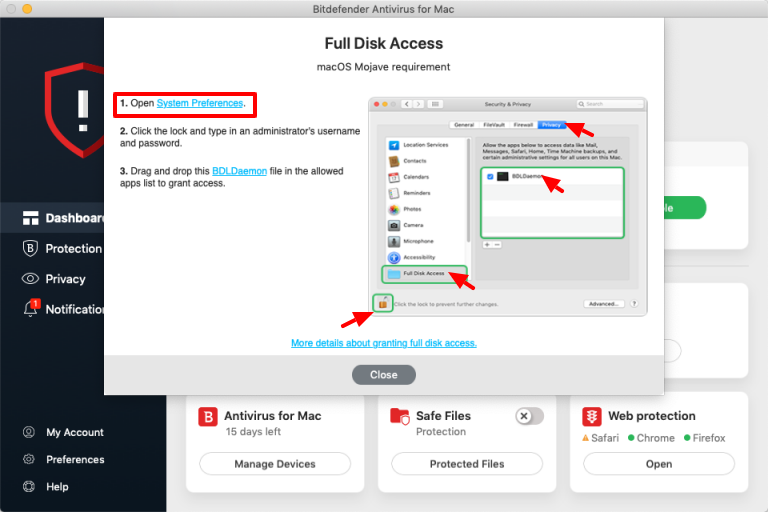
Open System Preferences, select Security & Privacy, go to Privacy tab and select Full Disk Access entry (you can also do this by clicking the link displayed at the first step in the window).
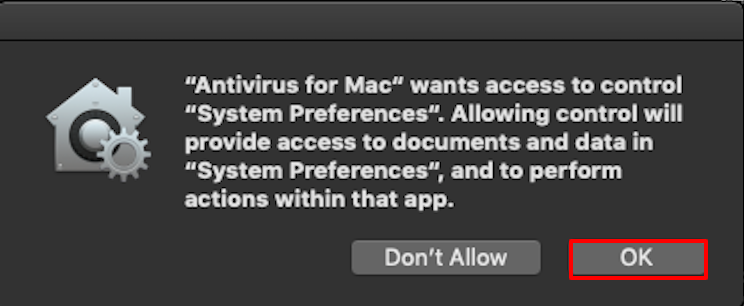
3. After opening System Preferences, a new window will appear on the screen, informing you that Antivirus for Mac wants access to control System Preferences. Click on OK.
4. To make changes, click the small padlock in the lower left-hand corner and enter an administrator username and password.

5. Go back to the window containing the instructions and click on the link displayed inside it at step 3 regarding BDLDaemon. After that, the window below should appear on the screen.
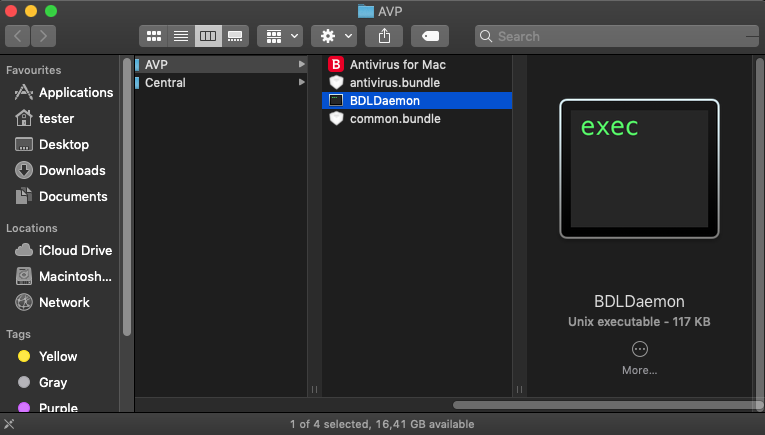
6. Drag & drop the file named BDLDaemon from the Finder window to the Full Disk Access window.
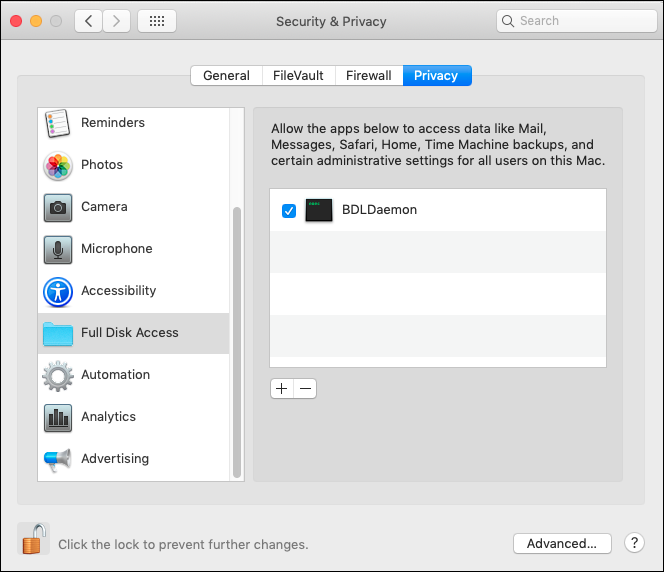
7. Finally, Bitdefender will mark the recommendation as solved. The requested permission is now granted and Bitdefender Antivirus for Mac is properly installed on Mojave.
How to continue installation on Catalina 10.15
You will be notified that a system extension signed by Bitdefender has been blocked. This is not an error.
• click the button Open Security Preferences, then OK. This will open Security & Privacy.
• click the lock to make the changes. When prompted, enter the password of an administrator account, then press Unlock.

• Click Allow to allow the Bitdefender extension.
Continue with the steps below.
1. Open the Bitdefender interface and click to open System Preferences.
2. In the Security & Privacy window, click the padlock in the lower-left corner. When prompted, type your administrator account password, and then press Unlock.

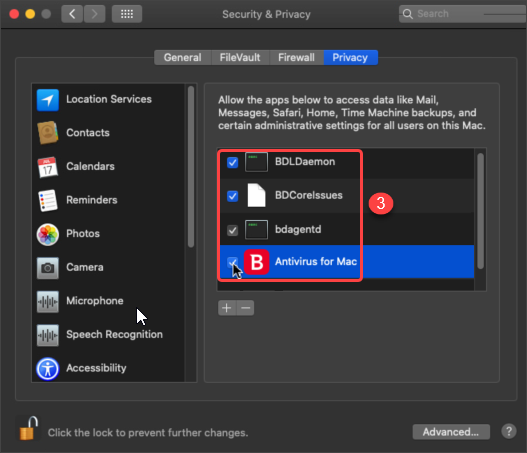
3. Check the boxes in front of these Bitdefender entries from the list:
BDLDaemon
BDCoreIssues
bdagentd
Antivirus for Mac
4. The following message appears after enabling the app Antivirus for Mac at step 3: “Antivirus for Mac” will not have full-disk access until it is quit. Press Quit Now and the Bitdefender interface will disappear from your screen.
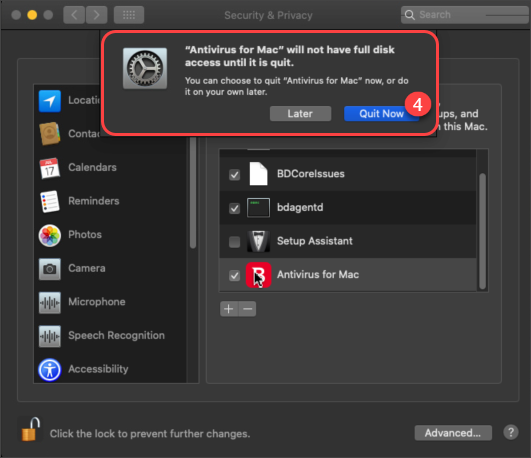
5. That’s it. Enjoy Bitdefender Antivirus for Mac on macOS Catalina!
How to install Bitdefender VPN on Mac
In macOS, VPN is a feature of Bitdefender antivirus for Mac. You get the daily quota of 200 MB daily traffic that is used in your antivirus for Mac subscription. But if Bitdefender VPN is not installed on your system, you can install it using one of the following methods:
- NOTE: macOS Sierra or a newer version is required. Older versions of macOS are not supported by Bitdefender VPN.
• Bring up Bitdefender Antivirus for Mac and go to Privacy. Click Open on the VPN tab.
• Alternatively, you can:
• Click on Go in the top menu bar and select Applications.
• Open the Bitdefender folder and double-click on Bitdefender VPN.
Related Articles

Install Bitdefender Parental Control on Windows
Before installing Parental Control on Windows you need to add a child profile in Bitdefender Parental Control. For...
Create a child account in Bitdefender Parental Control
Create a child account on Bitdefender Parental Control to limit your children’s access to the Internet. Also, you can...

Reset the Bitdefender product password
How to reset the Bitdefender product password? If you protect your Bitdefender settings with a specific password...
0 Comments